
To clean your commercial ice cream machine effectively, first gather all supplies and confirm the machine is turned off and unplugged safely. Disassemble the parts, labeling them for easy reassembly. Rinse everything with warm water, then scrub each component with a food-grade detergent using a brush or sponge to remove buildup. Rinse again thoroughly, then sanitize all parts before reassembling. For detailed steps and tips, keep going—you’ll find everything you need for a thorough clean.
Key Takeaways
- Turn off and unplug the machine before disassembly to ensure safety.
- Disassemble parts carefully, label them, and organize for thorough cleaning.
- Rinse all components with warm water, then scrub with food-safe detergent and brushes.
- Sanitize all food-contact parts before reassembling to prevent bacterial growth.
- Conduct a test run to verify proper operation and consistent freezing quality.
Gather Your Cleaning Supplies and Prepare the Machine

Before you begin cleaning your commercial ice cream machine, gather all necessary supplies to guarantee a smooth process. Check your cleaning protocols and make sure you have the right cleaning solutions, brushes, gloves, and towels. Refer to your maintenance checklist to confirm you haven’t missed any key supplies or steps. Having everything ready beforehand helps you stay efficient and prevents interruptions during cleaning. Make sure to have food-safe sanitizers and cleaning agents suitable for your machine’s components. Prepare a clean workspace to keep supplies organized. This preparation simplifies the process, reduces the risk of cross-contamination, and ensures you adhere to proper maintenance standards. Being thorough at this stage sets a strong foundation for a safe, effective cleaning routine. Incorporating proper hygiene practices is essential for maintaining both the safety and performance of your machine.
Turn Off and Unplug the Equipment Safely

First, locate the power switch and turn off the machine. Then, unplug the power cord to confirm it’s completely disconnected. Finally, double-check that the equipment has shut down before proceeding with cleaning. Additionally, ensure that the electrical components are fully powered off to prevent any electrical hazards during maintenance.
Locate Power Switch
To guarantee safety during cleaning, you should locate the power switch on your commercial ice cream machine and turn it off. Knowing the power switch location is essential to prevent accidents. Before unplugging, ensure the machine is fully powered down to avoid electrical hazards. Always follow safety precautions to protect yourself and the equipment. Additionally, understanding the electrical components of your machine can help you troubleshoot and prevent potential issues. Remember these key points:
- Check the power switch location before starting.
- Turn off the switch completely.
- Confirm the machine is unresponsive.
- Do not rely solely on unplugging as the first step.
- Be aware of any indicator lights that signal power status.
Taking these steps helps ensure safe and effective cleaning, reducing the risk of electrical shock or damage. Properly locating and turning off the power switch is a crucial part of safe maintenance procedures.
Disconnect Power Cord
Once you’ve confirmed the machine is powered off, the next step is to disconnect the power cord to guarantee complete safety. This guarantees there’s no electrical current running through the machine during cleaning. Handling the power cord safety prevents accidents and electrical hazards. Carefully grasp the plug, not the cord, to avoid damaging the wire. Always perform an electrical disconnect by unplugging the machine from the wall outlet. Proper safety procedures are essential to prevent injuries during maintenance.
Verify Equipment Off
Before you start cleaning, make sure the equipment is completely turned off and unplugged to prevent any electrical accidents. Verifying that the machine is off is vital for power safety and effective equipment maintenance. Always double-check that the power switch is in the off position before unplugging. Additionally, familiarize yourself with Halloween safety tips to ensure a secure environment during your maintenance routine. Remember:
- Confirm the machine has stopped running
- Unplug the power cord directly from the outlet
- Avoid pulling on the cord itself
- Wait for any moving parts to come to a complete stop
- Test the equipment with your hand to ensure no residual power remains
This step minimizes electrical risks and guarantees safe cleaning procedures. Properly turning off and unplugging your ice cream machine protects you and prolongs its lifespan.
Empty and Disassemble the Parts for Cleaning
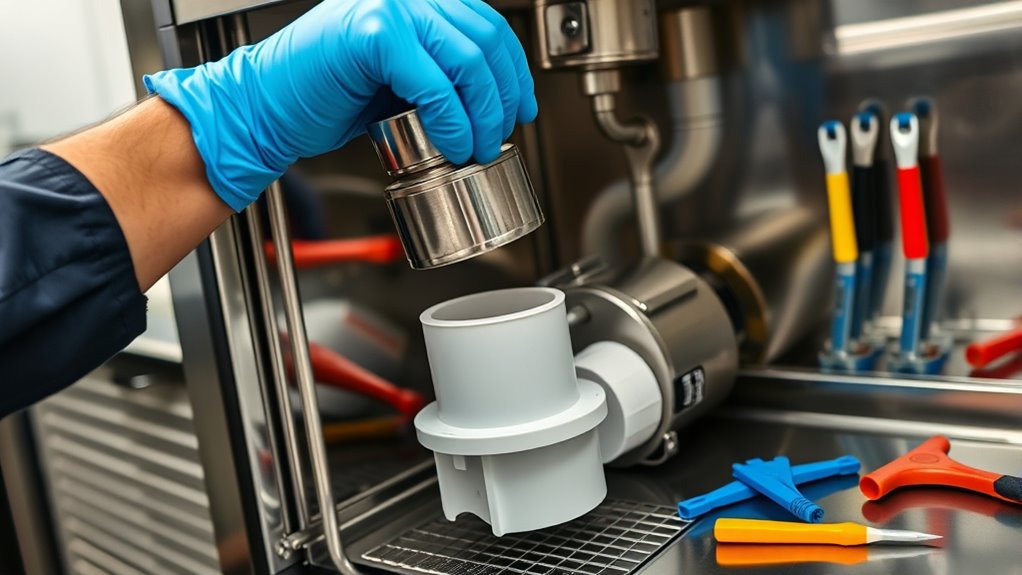
Begin by turning off the machine and unplugging it to guarantee safety. Next, carefully disassemble the parts using proper disassembly techniques. As you remove each component, label it clearly to avoid confusion during reassembly. This step ensures thorough cleaning and helps prevent damage. Use the table below to organize your parts:
| Part Name | Disassembly Technique | Labeling Tip |
|---|---|---|
| Auger Assembly | Unscrew gently | Use waterproof marker |
| Hopper Lid | Lift carefully | Tape labels for clarity |
| Churning Agitator | Detach bolts | Use color-coded tags |
| Cooling Plate | Remove screws | Write directly on parts |
| Drip Tray | Slide out | Keep in order |
Following these steps ensures a smoother cleaning process and efficient reassembly later. Proper cleaning and maintenance of your commercial ice cream machine help ensure optimal performance and longevity, making this process essential for any operator.
Rinse All Components With Warm Water

To effectively remove any residual cleaning solution and debris, you should rinse all disassembled components with warm water. Using water at the right temperature ensures thorough rinsing without damaging parts. Warm water helps loosen remaining residues and prevents buildup, which can affect your machine’s performance. Remember, proper rinsing should be part of your regular cleaning frequency to maintain hygiene and efficiency.
Rinse all parts with warm water to remove residues and maintain optimal machine performance.
- Use water that’s comfortably warm, not hot, to avoid warping parts
- Rinse each component individually to ensure no spots are missed
- Pay extra attention to corners and crevices where debris can hide
- Avoid rushing; thorough rinsing takes a few extra seconds
- Consistently rinse after each cleaning to prevent soap or residue buildup
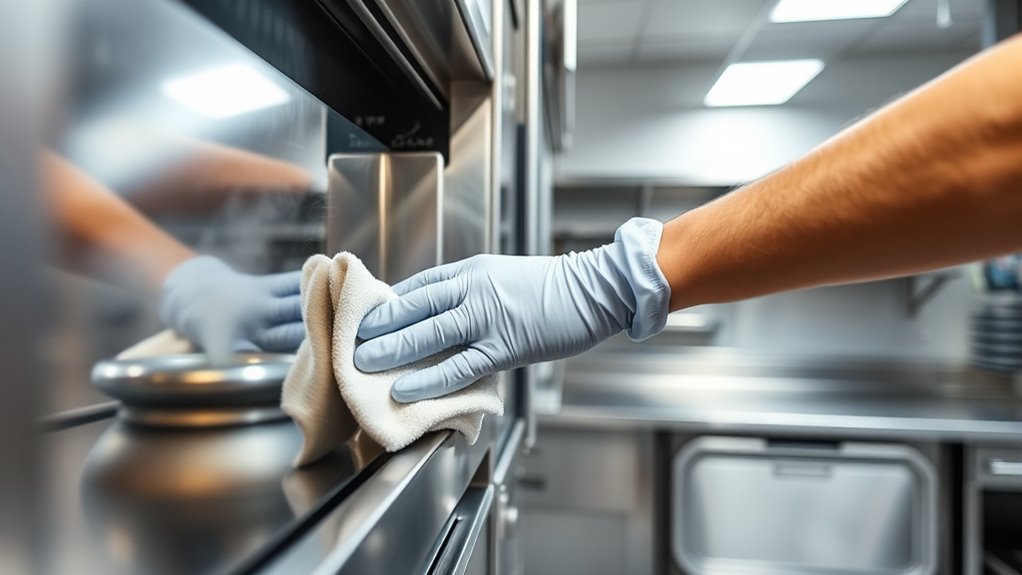
Clean Each Part Thoroughly With a Food-Grade Detergent
After rinsing all components with warm water, it’s time to thoroughly clean each part with a food-grade detergent. Use a quality food grade cleaning product to ensure complete sanitation without risking contamination. Focus on all surfaces, especially those in contact with ice cream, to remove any residue or buildup. To help visualize, here’s a quick guide:
| Part | Cleaning Tip |
|---|---|
| Freezer Door Seals | Gently scrub to remove debris |
| Auger Assembly | Use a sponge to reach tight spots |
| Hopper | Rinse and wipe with detergent |
| Chilling Plates | Clean thoroughly for thorough sanitation |
| Dispensing Nozzles | Sanitize with food-safe cleaner |
This step guarantees your machine’s parts are spotless and safe for use. Proper cleaning also helps prevent contamination risks that could compromise product quality and safety.
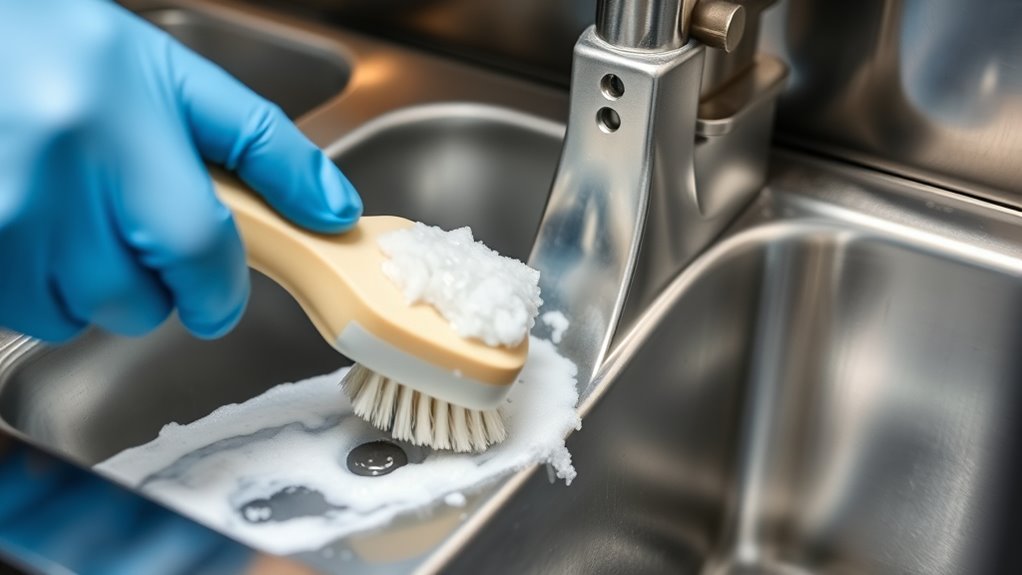
Use a Brush or Sponge to Remove Residual Buildup
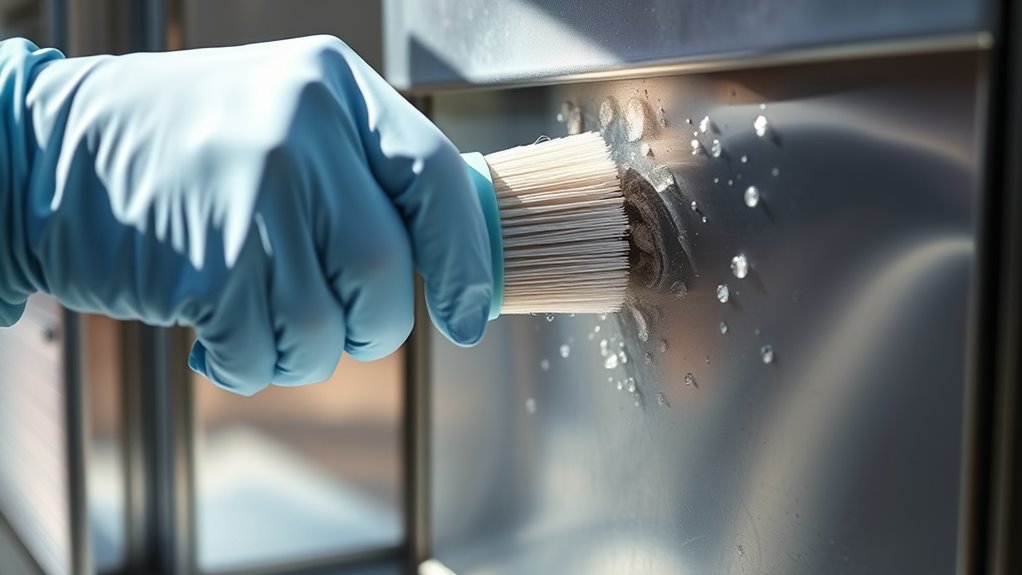
Since residual buildup can harbor bacteria and affect the quality of your ice cream, it’s important to remove it thoroughly using a brush or sponge. Use a brush technique to reach into crevices and stubborn spots, guaranteeing no residue is left behind. When selecting a sponge, choose one with a gentle abrasive side to scrub without damaging surfaces. Proper scrubbing helps break down stubborn deposits and prevents buildup from spreading. Remember to replace sponges regularly to avoid cross-contamination. Keep these points in mind:
- Use firm, gentle strokes with the brush or sponge
- Focus on corners and hard-to-reach areas
- Avoid using overly abrasive sponges that can scratch surfaces
- Rinse the sponge frequently to remove loosened buildup
- Always select a sponge suited for food equipment cleaning
Being aware of common pitfalls can help you maintain a hygienic and efficient machine, ensuring your ice cream stays fresh and safe for consumption.
Rinse Off Soap and Detergent Residues Completely

Even if you’ve thoroughly scrubbed your ice cream machine, soap residue and detergent buildup can still remain, risking contamination and affecting your product’s taste. It’s essential to rinse all parts thoroughly with clean water to remove any leftover soap or detergent. Failing to do so can leave behind residues that might interfere with the freezing process or cause flavor issues. Take your time to ensure every surface is rinsed well, especially in hard-to-reach areas. Use a gentle stream of water to wash away any lingering soap or detergent buildup. Remember, incomplete rinsing can compromise the quality of your ice cream and lead to costly re-cleaning. Proper rinsing guarantees your machine is spotless and ready for the next batch. Regular rinsing also helps maintain the cleanliness of your equipment, preventing bacteria buildup and ensuring optimal performance.
Sanitize All Parts Before Reassembling

Before reassembling your ice cream machine, it’s essential to sanitize all parts to eliminate any remaining bacteria or contaminants. Follow proper sanitizing procedures to ensure your equipment stays safe and operates efficiently. Proper cleaning protocols involve thoroughly disinfecting all components that contact food, including the dasher, hopper, and nozzle. Skipping this step can lead to bacterial growth and spoilage. Remember, sanitation isn’t just about cleaning; it’s about ensuring a safe, hygienic environment. To maintain compliance and prevent health issues, adhere to local health regulations for sanitizing procedures.
Perform a Test Run to Ensure Proper Functioning

Once you’ve reassembled your machine, run a test to make sure everything works correctly. Pay attention to how well the machine operates, check that the freezing feels consistent, and observe the quality of the output. This step helps guarantee your cleaning was successful and that the machine is ready for use. Additionally, conducting a performance check can help identify any issues early on, ensuring your ice cream machine maintains optimal functionality.
Check Machine Operation
How can you be sure your ice cream machine is ready for operation? The key is performing a thorough test run to confirm everything functions correctly. Start by checking machine calibration to guarantee the settings are accurate for ideal consistency. During the test, inspect all components for proper operation—look for leaks, unusual noises, or irregular freezing. Additionally, ensuring your machine’s automation technologies are functioning properly can help streamline the testing process and prevent issues during regular use. Remember, a successful test run depends on these steps:
- Confirm temperature gauges are within the correct range
- Ensure all safety switches are engaged
- Verify the compressor runs smoothly
- Check mixing and dispensing mechanisms
- Observe for consistent ice cream texture
Verify Freezing Consistency
Performing a test run is the best way to verify your ice cream machine’s freezing consistency. After cleaning, run the machine for a few minutes and observe the texture of the ice cream. Proper freezing consistency means a smooth, creamy product without large ice crystal formation. If you notice ice crystals or a grainy texture, the machine may not be freezing evenly. This could indicate issues with the refrigerant level or temperature settings. Ensuring the machine reaches the correct freezing point is essential for quality. During the test, check if the ice cream maintains a consistent, firm texture without excessive ice buildup. Adjust the temperature if needed, and run another test to confirm the machine’s freezing consistency before serving customers.
Assess Output Quality
To guarantee your ice cream machine is functioning properly, it’s essential to conduct a thorough test run after cleaning and adjustments. This helps you assess output quality and ensure your product meets standards. During the test, focus on ice cream flavor testing to verify consistency, texture, and taste. Also, consider customer satisfaction surveys to gather feedback on flavor and presentation. Monitoring for hydrocolloid technology effectiveness can help confirm that impurities are being properly drawn out, ensuring better product quality. Remember these key points: – Check for smooth, uniform texture – Confirm proper freezing consistency – Taste-test for flavor accuracy – Observe for any unusual noises or malfunctions – Record results for future reference Performing this test run ensures your machine produces high-quality ice cream that delights customers and maintains your reputation. Adjustments can be made immediately if issues arise, preventing compromised product from reaching your customers.
Frequently Asked Questions
How Often Should I Clean My Commercial Ice Cream Machine?
You should clean your commercial ice cream machine regularly to keep it running smoothly and guarantee product quality. Aim for a cleaning schedule of at least once a week, but if you operate frequently, consider cleaning every 24 to 48 hours. Pay special attention to machine parts like the nozzles and drip trays. Consistent cleaning prevents buildup, reduces bacteria, and extends the life of your equipment.
Can I Use Household Cleaning Products on My Machine?
Think of your machine as a delicate symphony, where each note matters. Using household products or cleaning chemicals not designed for your equipment is like adding discordant instruments—destined to cause damage. You shouldn’t rely on household cleaning products on your machine, as they can leave residues or harm parts. Instead, opt for the right cleaning solutions, ensuring your machine stays in harmony and runs smoothly.
What Are Signs That My Machine Needs Professional Maintenance?
You’ll notice signs like unusual noises, inconsistent ice cream texture, or lingering odors, indicating your machine might need professional maintenance. Regular checks for proper machine lubrication are essential, and if you see worn or damaged components, it’s time for component replacement. Addressing these issues promptly helps prevent costly repairs, ensures smooth operation, and keeps your ice cream quality high. Don’t ignore these signs—schedule expert maintenance when needed.
Is It Necessary to Sanitize After Every Cleaning?
Think of your ice cream machine as a trusted friend—regular sanitization is like giving it a fresh breath. You don’t need to sanitize after every cleaning if your cleaning schedule is thorough and proper. Typically, sanitization should happen after each shift or daily, depending on usage. This ensures food safety and ideal performance. Stick to a consistent sanitization frequency, and your machine will serve delicious treats safely and reliably.
How Long Does Each Cleaning Process Typically Take?
Each cleaning process usually takes about 20 to 30 minutes, depending on your cleaning schedule and the complexity of your machine. You’ll need to gather the right cleaning tools beforehand to make the process smooth. Regularly scheduled cleanings guarantee your machine stays in top condition, and setting a consistent cleaning schedule helps you stay organized. Be thorough, and don’t rush—proper cleaning keeps your ice cream fresh and safe for your customers.
Conclusion
By giving your ice cream machine a gentle, thorough clean, you’re not just maintaining its performance—you’re caring for the quality of every scoop. A little effort now guarantees each treat delights your customers and keeps your business shining. When your machine runs smoothly, it’s like a silent hug for your dedication. Embrace this routine as a small act of kindness that preserves the magic, turning everyday cleaning into a gesture of love for your craft.