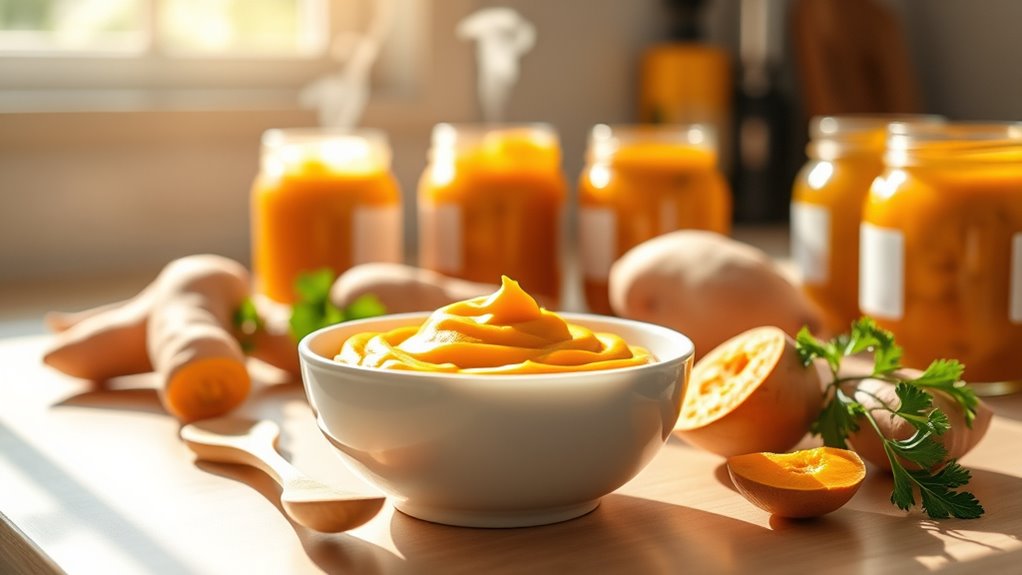
Making your own baby food is easy and fun! Start by steaming sweet potatoes until soft. Once they’re tender, puree the sweet potatoes in a blender or food processor. You can add a little water, breast milk, or formula to get the right consistency. Pour the puree into ice cube trays, freeze, and then store in labeled freezer bags. This wholesome recipe is just the beginning of what you can create for your little one!
Key Takeaways
- Choose fresh fruits or vegetables, like sweet potatoes or apples, for your DIY baby food recipe to ensure optimal nutrition and flavor.
- Steam or boil the chosen ingredients until tender, making them easier to puree for a smooth texture suitable for babies.
- Use a blender or food processor to puree the cooked ingredients, adding water, breast milk, or formula to achieve the desired consistency.
- Portion the pureed baby food into ice cube trays for easy freezing and storage, allowing for quick meal preparation later.
- Label the frozen portions with the date and ingredient for easy identification and ensure proper thawing methods before serving.

Making your own baby food can be a rewarding and economical choice for parents. Not only does it save you money compared to buying prepackaged options, but it also gives you complete control over what your little one consumes. By making baby food at home, you can avoid preservatives and heavy metals often found in store-bought products. Additionally, homemade baby food allows you to reduce exposure to heavy metals that may be present in commercial alternatives. Homemade baby food can also offer educational benefits as you introduce your baby to a variety of flavors and textures, which can help your baby develop a diverse palate early on.
Making your own baby food is a cost-effective way to ensure your baby enjoys fresh, preservative-free meals tailored to their needs.
To get started, you’ll need some essential equipment. A baby food maker is an all-in-one tool that can steam and puree ingredients seamlessly. If you don’t have one, a good blender or food processor works just as well for pureeing cooked foods into a smooth consistency.
You’ll also need a steamer to cook fruits and vegetables until tender. For storing your creations, ice cube trays or specialized baby food trays are perfect for portioning and freezing. Don’t forget freezer bags to hold the frozen portions; they’ll help you stay organized.
Choosing the right ingredients is crucial. Fresh produce, like fruits and vegetables, is ideal, but frozen options are also great when fresh isn’t available. Incorporating meat and grains can add necessary protein and fiber to your baby’s diet.
Aim for a rainbow of colors to ensure your baby gets a variety of vitamins and nutrients while avoiding choking hazards by removing seeds, pits, and tough skins.
When preparing the ingredients, start by washing them thoroughly to eliminate dirt and bacteria. Steaming or boiling softens the ingredients, making them easier to puree. Use your blender or food processor to achieve the desired consistency, and add a little water, breast milk, or formula to thin it out if necessary.
After preparing, you can freeze the portions and label them for easy access later.
Frequently Asked Questions
How Do I Store Homemade Baby Food Safely?
To store homemade baby food safely, use BPA-free containers or glass jars and keep them in the refrigerator for 24 to 48 hours.
Always label your containers with the date and contents.
For longer storage, freeze portions in ice cube trays or freezer bags, where they can last 1 to 2 months.
Remember to reheat food to at least 165°F before serving, and avoid reheating more than once to maintain safety.
Can I Freeze DIY Baby Food?
Yes, you can freeze DIY baby food!
Just make sure to use airtight containers or ice cube trays to keep it fresh.
It’s best to consume frozen baby food within 1-3 months for optimal quality, though it can last up to six months.
Remember to label and date your containers for easy identification.
When you’re ready to use it, thaw in the fridge or microwave, and always check the temperature before serving.
When Can I Start Giving My Baby Solid Food?
You can start giving your baby solid food between 4 to 6 months, depending on their readiness.
Look for signs like good head and neck control, interest in food, and the ability to swallow without pushing it out.
It’s crucial to wait until your baby is developmentally ready, as introducing solids too early can pose health risks.
Always consult your pediatrician to ensure you’re following the best approach for your little one.
What Kitchen Tools Do I Need for DIY Baby Food?
To make DIY baby food, you’ll need a few essential kitchen tools.
Start with a blender or food processor for smooth purees. A steamer insert helps retain nutrients while cooking veggies. Use pots and pans for cooking and a cutting board for prep.
Ice cube trays are perfect for freezing portions. Don’t forget baby spoons for feeding and suction bowls to minimize mess.
These tools make the process easier and more efficient for you!
How Do I Introduce Allergens in Baby Food?
To introduce allergens in baby food, start small by offering tiny amounts of one allergenic food at a time, like peanut or egg.
Wait a few days before introducing another allergen to monitor for reactions. Gradually increase the amount if no issues arise.
Keep an eye out for signs like rashes or digestive upset.
Always consult your pediatrician, especially for high-risk babies, to ensure you’re following the best practices for safety.
Conclusion
With just a few simple steps, you’ve transformed fresh fruits and veggies into a vibrant, nutrient-packed puree for your little one. Picture the bright orange of sweet potatoes or the lush green of peas swirling together in a bowl, each bite bursting with flavor and goodness. As you spoon-feed this wholesome creation, you’re not just nourishing your baby; you’re crafting memories filled with love and care. Enjoy this delightful journey of homemade baby food together!